Need to update PHP for use with your local development stack? This short guide will run you through how to do just that, as well as upgrading your PHP version in Laravel Valet.
Upgrading PHP with Homebrew
Assuming you already have Homebrew installed
Update Brew.
brew updateInstall the latest version of PHP.
brew install phpAlternatively, if you're looking to use a specific version to match your production server version you can add @ then the version number to the end of the formula. So if you wanted to install PHP 7.3, you would use the following command.
brew install [email protected]Check which version of PHP you're currently running by using php -v.
php -v

PHP 7.1.30 (cli) (built: Jun 17 2019 08:52:19) ( NTS )
Copyright (c) 1997-2018 The PHP Group
Zend Engine v3.1.0, Copyright (c) 1998-2018 Zend Technologies
with Zend OPcache v7.1.30, Copyright (c) 1999-2018, by Zend Technologies`
Unlink your old PHP version from brew by typing the old PHP version minus the minor update number. (In this example's case we are using PHP 7.1.30, so we would use PHP 7.1)
brew unlink [email protected]Note: PHP went through a formula update in 2018 where php71 is now [email protected] so be sure to try both ways if you're running into issues.
Link your new PHP version.
brew link [email protected]Note: Replace 7.3 with whatever version of PHP you want to switch to or remove @7.3 completely if you just ran brew install php
Updating Your \$PATH
Now that your PHP is updated and linked, make sure your $PATH is properly setup.
Open ~/.bash_profile in your favorite text editor and add the following: (Replace PHP 7.3.7 with whatever version of PHP you're using)
# Setting PATH for PHP 7.3
export PATH="/usr/local/opt/[email protected]/bin:$PATH"
export PATH="/usr/local/opt/[email protected]/sbin:$PATH"Note: After modifying your .bash_profile you must fully close out of your terminal and re-launch it for your changes to take effect. Alternatively, you can type source ~/.bash_profile in your terminal for the changes to take effect.
Adding PHP Packages
Homebrew now uses PECL for all PHP packages, you may need to reinstall any packages that were previously managed with Homebrew.
To find out if you're already using PECL packages type the following command in your terminal to list out any packages that you may have installed.
pecl listInstall your PECL packages. Imagick is the only one I use, which handles image transformations in Craft CMS. To install it, run the following command
pecl install imagickNote: To to see a list of all PECL packages, refer to https://pecl.php.net/
Configure PHP Settings
In order to figure out where your php.ini settings are located, run the following command in your terminal.
php --iniPHP in Homebrew by default adds a file called php-memory-limits.ini which is in the following location. This will overwrite the settings in the default php.ini and make it easier to move over to a new installation in the future.
Configuration File (php.ini) Path: /usr/local/etc/php/7.3
Loaded Configuration File:         /usr/local/etc/php/7.3/php.ini
Scan for additional .ini files in: /usr/local/etc/php/7.3/conf.d
Additional .ini files parsed:      /usr/local/etc/php/7.3/conf.d/ext-opcache.ini,
/usr/local/etc/php/7.3/conf.d/php-memory-limits.ini
Modify your php-memory-limits.ini file and move over your settings. Below is a list of my personal config file.
; Max memory per instance
memory_limit = 1024M

;Set the max ececution time of a script.
max_execution_time = 300

;The maximum size of an uploaded file.
upload_max_filesize = 128M

;Sets max size of post data allowed. This setting also affects file upload. To upload large files, this value must be larger than upload_max_filesize
post_max_size = 128M
Upgrading Valet
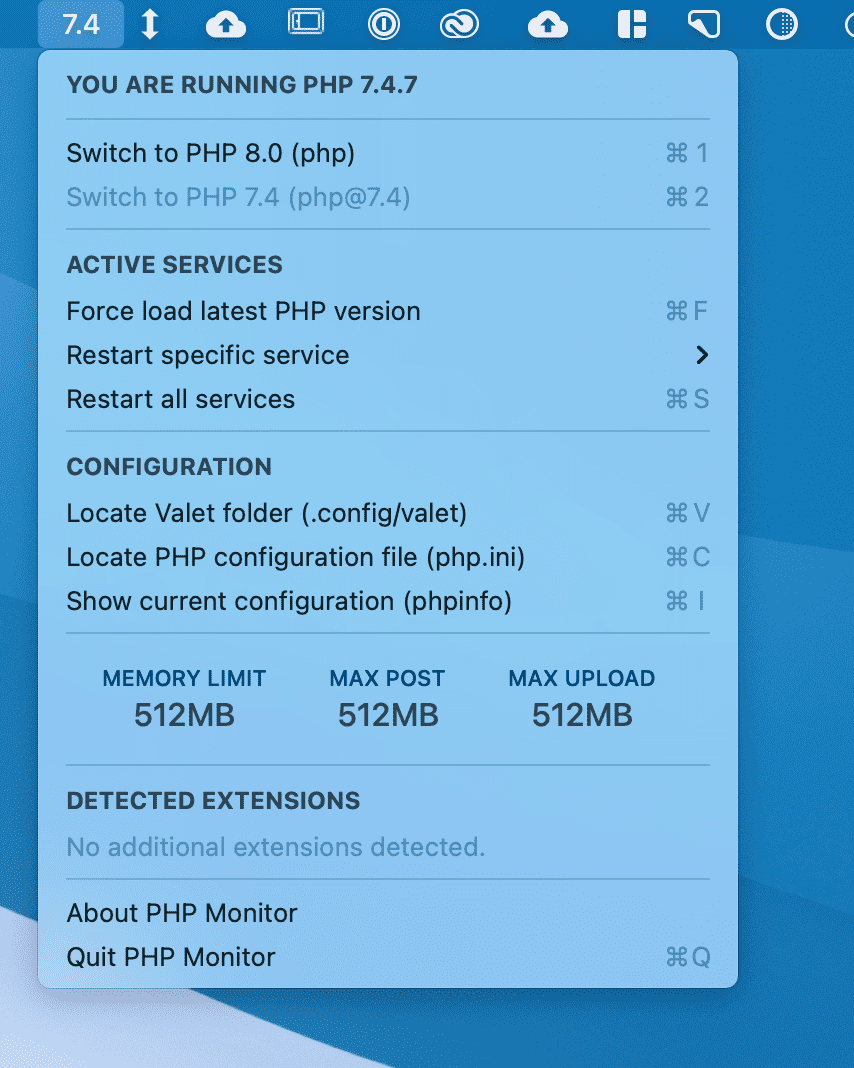
Update: There's also a handy utility called PHP Monitor that allows you to see PHP information, switch between versions and allows you to quickly modify your php.ini files.
If you use Laravel Valet for all your local development, here are the steps to finish upgrading PHP. Run the following commands to update Valet in your terminal:
Update all composer files.
composer global updateRun the install script for Valet.
valet installRestart Valet by running the restart script.
valet restart